Running Windows under Qemu
I needed to make the cheapest door controller on Amazon work recently. I decided my best bet was to run a Windows virtual machine on an isolated network connected only to the door controller. The server available on site was fairly minimal and was not set up to host virtual machines. The script below just needs the qemu-system-x86_64 binary to be available and not a full VM system like virt-manager or VirtualBox.
The solution I came up with was to install and run Windows in a qemu/KVM VM on the server with a VNC client running on my laptop.
There are a number of files to collect. Here are the download links. You should put them into one directory:
You’ll need a valid Windows license key for the installation.
Create a 30GB virtual hard disk image:1
2cd /vm/windows
qemu-img create -f qcow2 windows.qcow2 30G
Run this script to begin the Windows installation. You will need to run vncviewer :1 once the VM is running:1
2
3
4
5
6
7
8
9
10
11
12
13
14
15
16
17
18
19
20
21
22
23
24
25
26
27
28
29
30
31
32
33
34
35
36
37#!/bin/bash
# Set this to the directory with all the files
IMAGE_DIR=/vm/windows
# Bridge the VM with the hosts' Ethernet
## My host's Ethernet interface was eno1
## Change to your interface!
ip link add link eno1 name macvtap0 type macvtap mode bridge
## Turn the bridge interface on
ip link set macvtap0 up
# Start the virtual machine
qemu-system-x86_64 \
-name "Insert Better Name" \
-bios ${IMAGE_DIR}/OVMF.fd \
-drive file=${IMAGE_DIR}/OVMF_CODE.fd,if=pflash,format=raw,unit=0,readonly=on \
-drive file=${IMAGE_DIR}/OVMF_VARS.fd,if=pflash,format=raw,unit=1 \
-enable-kvm \
-cpu host \
-smp 2 \
-m 8192 \
-boot d \
-vga qxl \
-vnc :1 -k en-us \
-rtc base=localtime,clock=host \
-usb -device usb-tablet \
-net nic,model=virtio,macaddr=$(cat /sys/class/net/macvtap0/address) \
-net tap,fd=3 3<>/dev/tap$(cat /sys/class/net/macvtap0/ifindex) \
-cdrom ${IMAGE_DIR}/Win10_21H1_English_x64.iso \
-drive file=${IMAGE_DIR}/virtio-win-0.1.190.iso,index=3,media=cdrom \
-drive file=${IMAGE_DIR}/windows.qcow2,if=virtio,format=qcow2 \
# The virtual machine has powered down, clean up the network
ip link del link dev macvtap0
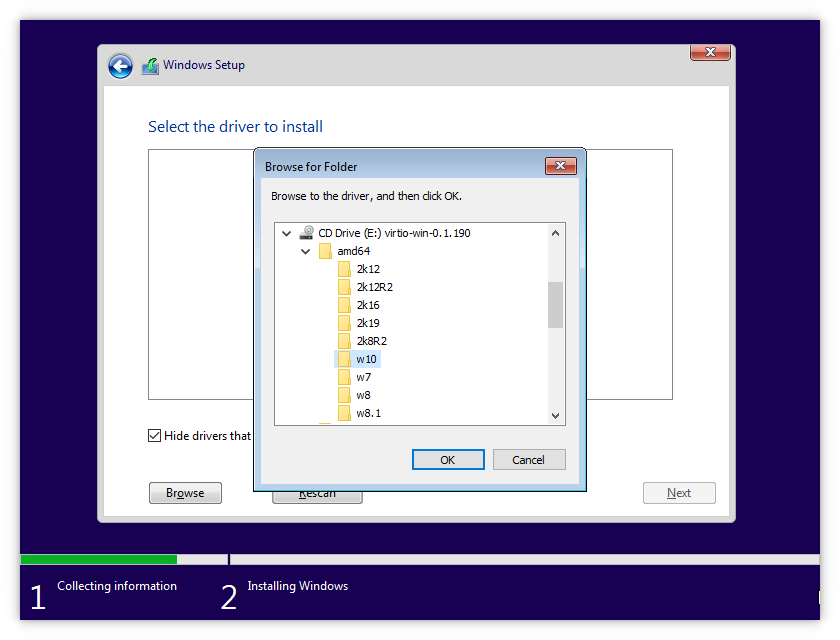
During the installation, Windows will not be able to see the hard disk and you will need to have it look at the second CD-ROM containing the Qemu VirtIO drivers:
After installation, you can remove these lines and continue using the script without the install media:1
2-cdrom ${IMAGE_DIR}/Win10_21H1_English_x64.iso \
-drive file=${IMAGE_DIR}/virtio-win-0.1.190.iso,index=3,media=cdrom \
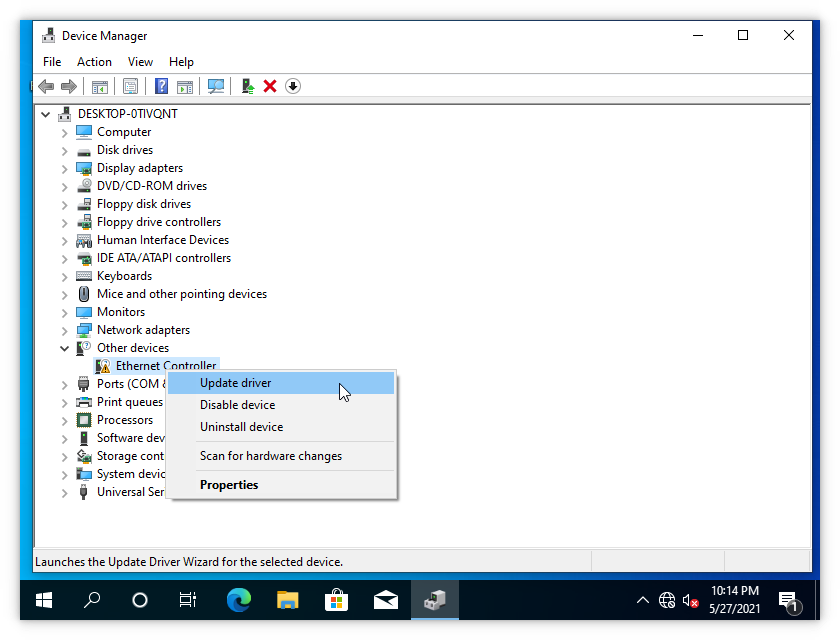
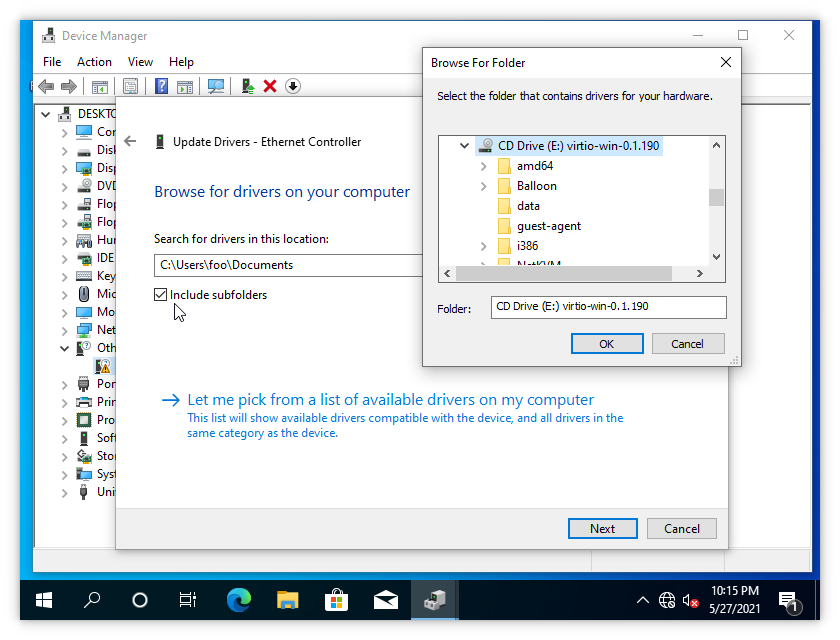
To get networking going, you will need to install the VirtIO network drivers:
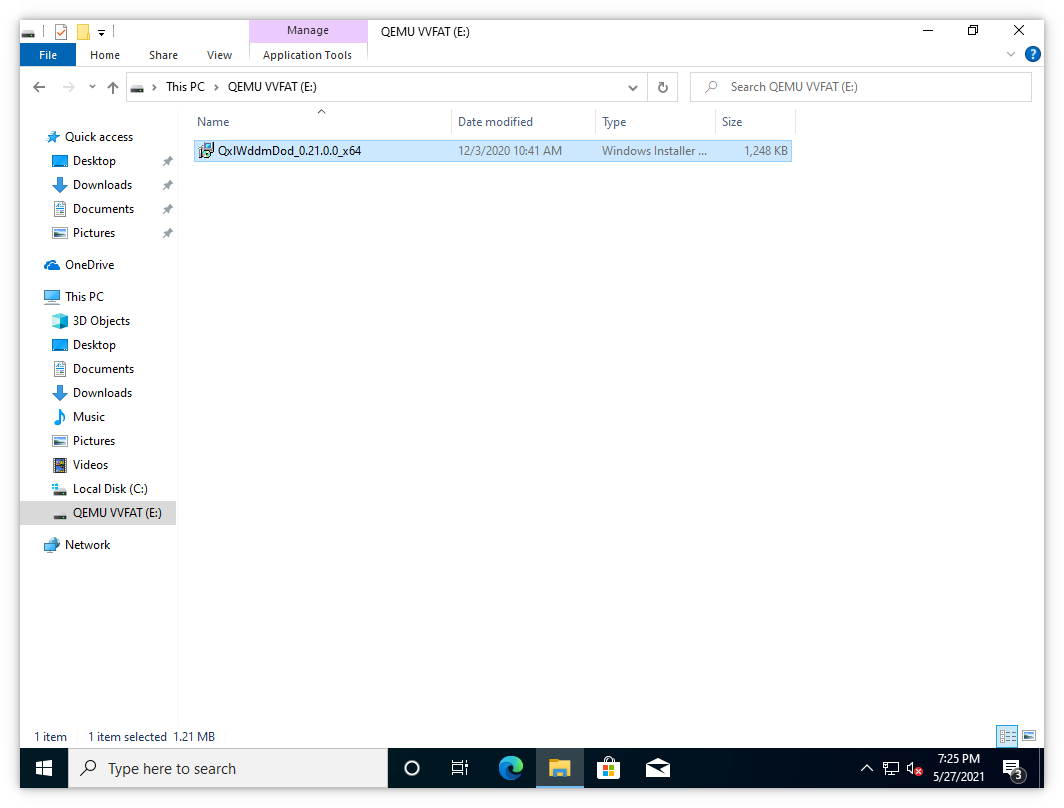
And you will probably want to install the QXL video adapter driver for better resolutions (include a line like -drive file=fat:rw:${IMAGE_DIR},format=raw if networking is not working):
You can backup the VM right after installation by copying the qcow2 file and compressing it:1
2
3cd /vm/windows
rsync -avPt --sparse windows.qcow2 windows.qcow2.fresh
gzip windows.qcow2.fresh
If you just want network access without the bridge, you can remove these lines:1
2
3
4
5
6
7ip link add link eno1 name macvtap0 type macvtap mode bridge
ip link set macvtap0 up
...
-net nic,model=virtio,macaddr=$(cat /sys/class/net/macvtap0/address) \
-net tap,fd=3 3<>/dev/tap$(cat /sys/class/net/macvtap0/ifindex) \
...
ip link del link dev macvtap0
And add:1
2-net nic,model=virtio \
-net user \
Links:
- QEMU Documentation
- Gentoo - QEMU/Windows guest
- Funtoo.org - Windows 10 Virtualization with KVM
- Get Labs Done - Windows 10 on Ubuntu KVM
- Any IT Here? Help Me! - Howto do QEMU full virtualization with MacVTap networking
- Reddit - Guide to running Windows 7 in QEMU
- Matteo Croce on Medium - Windows as QEMU Guest
- Fedora Project - virtIO Drivers
- QXL-WDDM-DOD Driver Home